Welcome!

Thanks for visiting! I have included information on drilling seaglass, ideas and designs on seaglass jewelry, my collection and beachcombing trips, and much much more! Take your time and enjoying browsing!

Search This Blog

Friday, July 3, 2009

Knitting Wire


I fell in love with knitting wire! Well, not the ordinary metal wire that left my fingers frayed and bleeding, but the nylon coated sterling silver / stainless steel cable that is smooth, flexible and durable! Infinite possibilities and combinations sprout from my imagination! Subtle rainbow, calm ocean, classy pearls and vibrant sea, I work in frenzy to bring them into reality! Drilled or not drilled, you could still knit them in either way! Beads or shells, gemstones, crystals or seaglass, knit them all in!


Tuesday, June 23, 2009

Simpicity


The simpler, the better - my latest concept.

The unique shapes and beauty of seaglass need only the simplest designs. Sometimes there are seaglass with such character and charm that they need only the simplest designs to become most impressive. For example, the seaglass key that needed only a key ring bail to become a stunning necklace. Or the sweet seaglass bubbles that needed only sterling posts to become exceptional earrings. And the rare turquoise seaglass that needed only to be side-drilled to become a breath-taking invisible necklace.

Each piece of seaglass 'talked' to me before I transformed them into unique jewelry. Some begged not to be drilled, some needed to be drilled to release their potentials; some boasted characters and prefered solitaire, others opted to hang around with peers. How I wish I have all the time in the world to listen!


Sunday, May 3, 2009

Seaglass Collectors

I have almost neglected my blog here since I joined the seaglasslovers community at ning.com. I am so at home amongst seaglass lovers and collectors all over the world, as much addicted to the hobby as I am. My beachcombing behavior is no longer odd: there are indeed thousands who beachcomb under more extreme conditions!
We show off our best finds and admire each other's collections, put in our two cents' worth in identifying odd beachcombed objects, exchange seaglass philosophy, and found strong bonding in our friendships.

Also a member of the seaglass collectors and seaglass artists, I have found great joy in viewing and admiring seaglass creations of many great artists. Posting my own creations there, I am overjoyed to received genuine approval and encouragement! Without the aggression or competition of a commercial site, here is a perfect place where artists gather and exchange ideas and skills.

Now, logging onto these sites has become one of the most important thing for me everyday!

Tuesday, March 17, 2009

Miniature Bottles

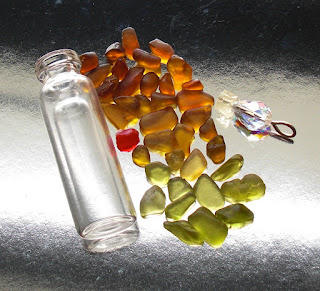
I have just discovered the beauty of miniature glass bottles, filled to the brim with teenie tiny sea glass or seashells! Working from the brilliant idea of a customer and after some experiments, I have made unique removable stoppers for these bottles using Swarovski crystal beads, pins and small pieces of rubber. These are more elegant and different from bead cap decorated corks! These bottles could be pendants, earrings, cellphone charms, suncatchers...anywhere you could dangle something pretty!


Saturday, February 7, 2009

Drilling Glass

I have been asked many a time about how to drill glass. Actually I was self taught and by no mean an expert, but here’s a step by step account of how I do it, and some tips on how to do it well!

Equipments:
1. Electric Drill and drill bits


To begin with, you will need a drill. I use a hand-held electric drill which I bought from a local hardware store. It’s light-weight and easy to use.

The drill bits should not be made of just any metal, but should be hard enough to cut through glass. Otherwise, you may just scratch the surface. Drilling on with force will just crack the glass.
I use diamond coated drill bits in several different sizes, all bought from ebay (just search 'diamond coated drill bits’ and you will have a variety of suppliers). I was told that aluminium carbide drill bits could cut glass as well. I tried, but learned the hard way that it did not.
2. Work surface


You will need something to support the glass. Like it or not, once the drill bit got through the glass, it would mark your work surface. If you don’t want dimples all over your workbench, place a wooden board underneath the glass. A board made of pine wood is soft enough for the drill bit to penetrate and perfect as a shock absorbent. A metallic surface is too hard and will always break the drill bit. A plastic surface is not good either: bits of plastic will melt and stick onto the hot drill bit.

3. Fix the glass in position before drilling


Fix the piece of glass firmly before you start drilling. Use the drill bit obliquely to make a nick first so that the drill bit won't slip. Then drill vertical to the glass surface. It’ll be great to have a device to clamp it down, holding it firmly with the other hand is good enough for me.
4. Water

While drilling, always keep the drill bit and glass wet. This will keep the temperature down and also lubricate the drilling. If the drill bit become dry but you kept on drilling, it will get stuck to the glass and eventually break or the glass will crack. always keep a spray bottle handy.

TIPS:
1. Clean cut edges on both sides of the hole


If you drill on through the glass from just one direction, the edge of the hole on the other surface will be rugged. Why? This is what happens: the glass over the drill bit become so thin that it cracks when the bit is about to emerge.


To make a hole with clean-cut edges on both surfaces, you will need to drill from both sides of the glass. I know there are expensive commercial drills that approach a gemstone or pearl simultaneously from both ends, it is slightly clumsier but not impossible with a hand-held drill.


I start drilling from one side, and stop from time to time to check the depth of the drill bit. When it’s about 1mm from the other surface, I flip the glass over, hold it to the light to see the tip of the hollow track. Make a mark, aim, drill and finish off. When the drill bit is about to emerge, you will hear a difference in the 'whirring' sound.

2. If you don't want your glass to crack


To avoid cracking your precious piece of sea glass, remember to well support its underside. DO NOT drill from its convex side and leave the hollow without supported: it’s bound to crack that way. Always drill from the concave side.

3. Clean the drill bit


During and after drilling, the drill bit will be covered with a white paste, which is wet, powdered glass. To keep your drill bit sharp, brush this off in water from time to time.

4. Enlarging the hole


What if you need a hole larger than any of your drill bits? Hold the glass firmly, press the drill bit firm against the 'wall' of the hole and move it around and and around, enlarging the hole to the right size.
5. Clean and oil your piece with olive oil to bring out its true color. It's done!


So you’re all set to go! Thanks for reading through. I welcome all comments and questions!

Thursday, January 29, 2009

Valentine's Day

Hearts! I've loaded up my shop with sea glass jewelry designed around the 'heart' shape for this special occasion. Naturally heart shaped sea glass and 'pair of heart' bracelets, anklets and necklaces: unique designs only on ecstasea.

But I haven't sold one so far! Has everyone settled for chocolate and cards instead of sea glass? Maybe the Christmas gift-giving frenzy has somehow drained everyone? Are my items priced fairly?

Feeling always optimistic and positive, I continued with my sea glass collecting and jewelry design, knowing that there are people out there who just love my stuff. Here's some of them if you're new to my shop!


Thursday, December 18, 2008

Christmas Frenzy

I don't have to be disappointed for long when none of my Halloween items sells, because the Christmas shopping frenzy arrived not long after the president election.

Throughout previous 10 months or so that I was here, I sold only 1-2 items per week, but in Mid November till Mid December, I sold 1-2 items everyday! That was not much compared to the best selling etsy shops, but it's a big big difference for me!

This Christmas will be my first on etsy and it's the first time I became part of this gift giving tradition. I love every bit of it! Just thinking that there's someone out there who will be wearing their gifts of my sea glass jewelry is the greatest encouragement for me to keep going. As long as the gift giving mood is there, I realized that any style, color or price will sell, not necessarily of Christmas theme! Here's some of my favorite that have become special Christmas gifts.